How to setup oauth?
OAuth 2.0 provider based on oauthlib is built into frappe. Third party apps can now access resources of users based on Frappe Role and User permission system. To setup an app to access
OAuth defines four roles
resource owner
An entity capable of granting access to a protected resource. When the resource owner is a person, it is referred to as an end-user.
resource server
The server hosting the protected resources, capable of accepting and responding to protected resource requests using access tokens.
client
An application making protected resource requests on behalf of the resource owner and with its authorization. The term "client" does not imply any particular implementation characteristics (e.g., whether the application executes on a server, a desktop, or other devices).
authorization server
The server issuing access tokens to the client after successfully authenticating the resource owner and obtaining authorization.
Setup OAuth Provider
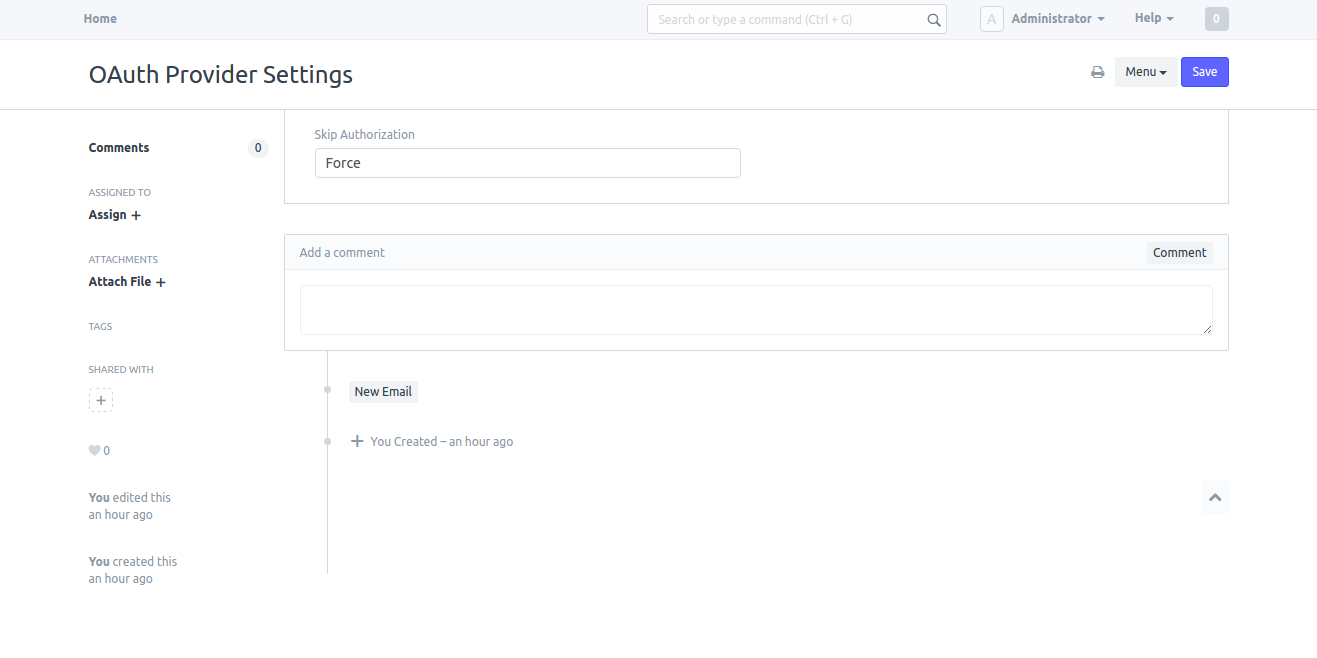
System Managers can setup behavior of confirmation message as Force or Auto in OAuth Provider Settings.
If Force is selected the system will always ask for user's confirmation. If Auto is selected system asks for the confirmation only if there are no active tokens for the user.
Go to
Setup > Integrations > OAuth Provider Settings
Add Primary Server
This is the main server hosting all the users. e.g. https://frappe.io. To setup this as the main server, go to Setup > Integrations > Social Login Keys and enter https://frappe.io in the field Frappe Server URL. This URL repeats in all other Frappe servers who connect to this server to authenticate. Effectively, this is the main Identity Provider (IDP).
Under this server add as many OAuth Client(s) as required.
Add a Client App
As a System Manager go to
Setup > Integrations > OAuth Client
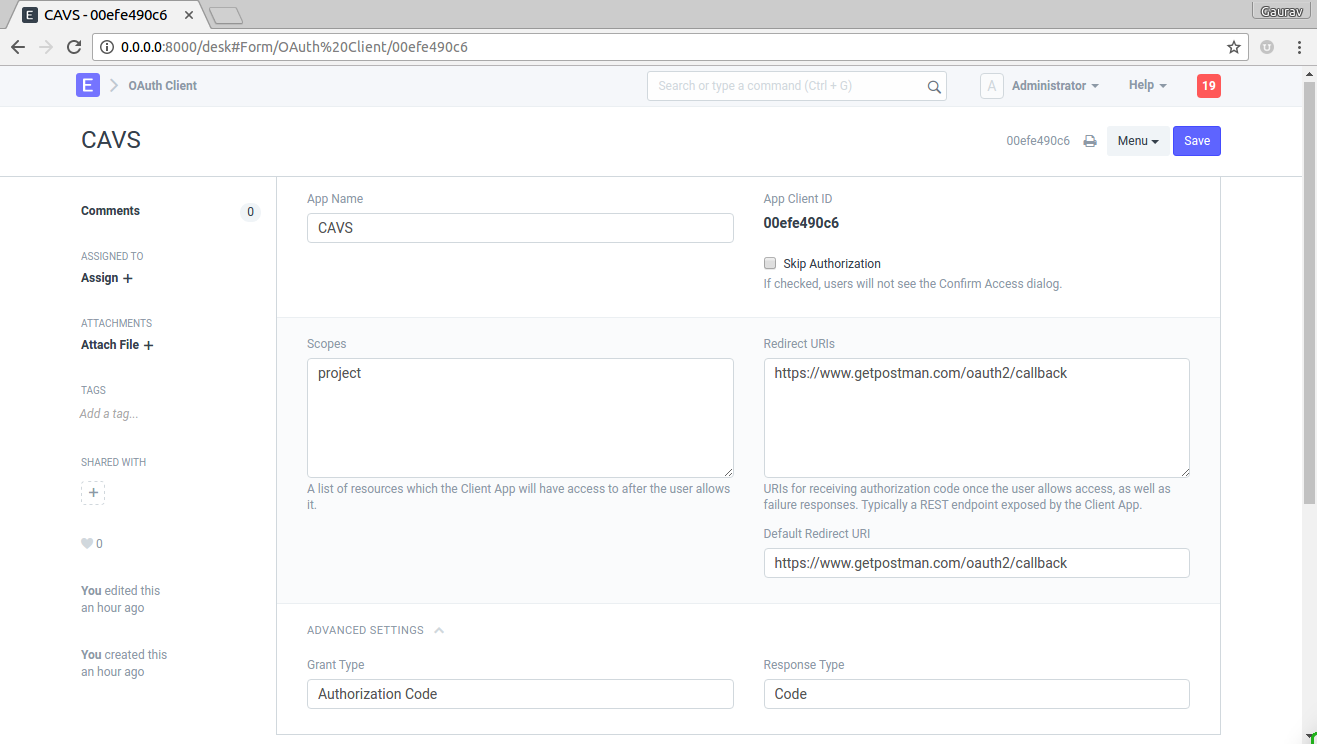
To add a client fill in the following details
- App Name : Enter App Name e.g. CAVS
- Skip Authorization : If this is checked, during authentication there won't be me any confirmation message
- Scopes : List of scopes shown to user along with confirmation message. scopes are separated by semicolon ';'
- Redirect URIs : List of Redirect URIs separated by semicolon ';'
- Default Redirect URIs : Default Redirect URI from list of Redirect URIs
- Grant Type: select
Authorization Code - Response Type: select
Code